Pages
Create custom pages with the built-in WYSIWYG editor, and inform your users about anything you like.
Add Custom Page
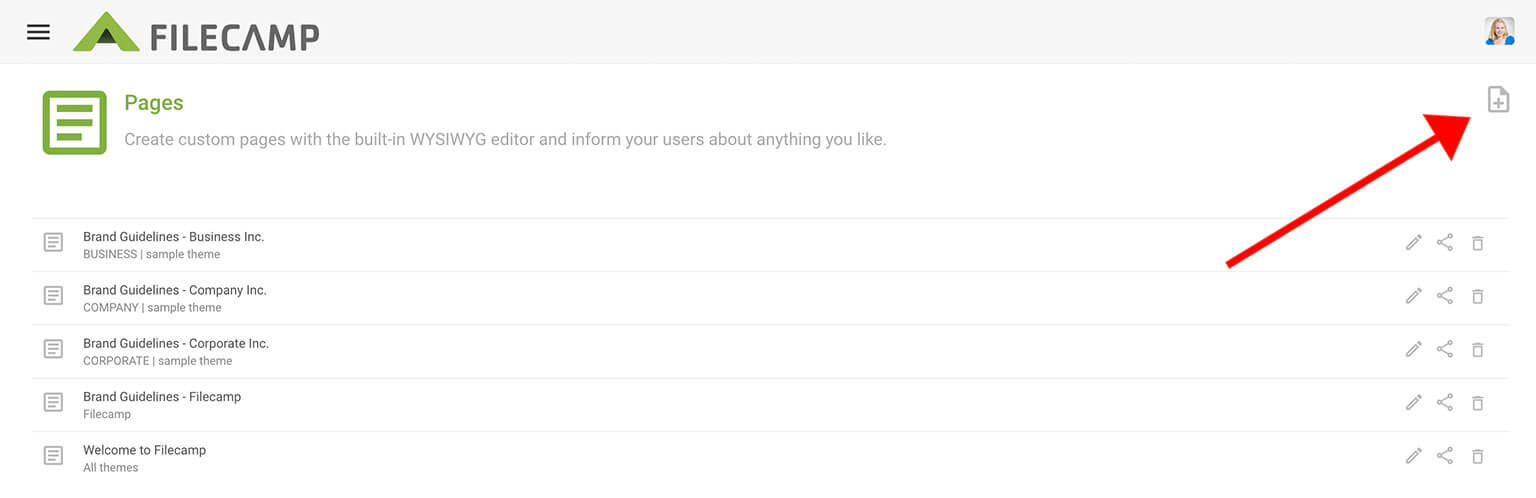
Go to Admin > Pages. Then click the Add page ![]() icon in the Toolbar. Give your page a name and click Create. A new blank page is now created and can be seen and edited from the Custom Pages List:
icon in the Toolbar. Give your page a name and click Create. A new blank page is now created and can be seen and edited from the Custom Pages List:
Edit a Page
Go to Admin > Pages. Find the Page you want to edit, and click the Edit ![]() icon. Now you can edit your page content and settings.
icon. Now you can edit your page content and settings.
- Title – Name your Page.
- Assign to theme – assign this page to a Theme if you want to segment who shall see this page in their Main Menu. Choose All themes if you want all your users to see this page in their main menu.
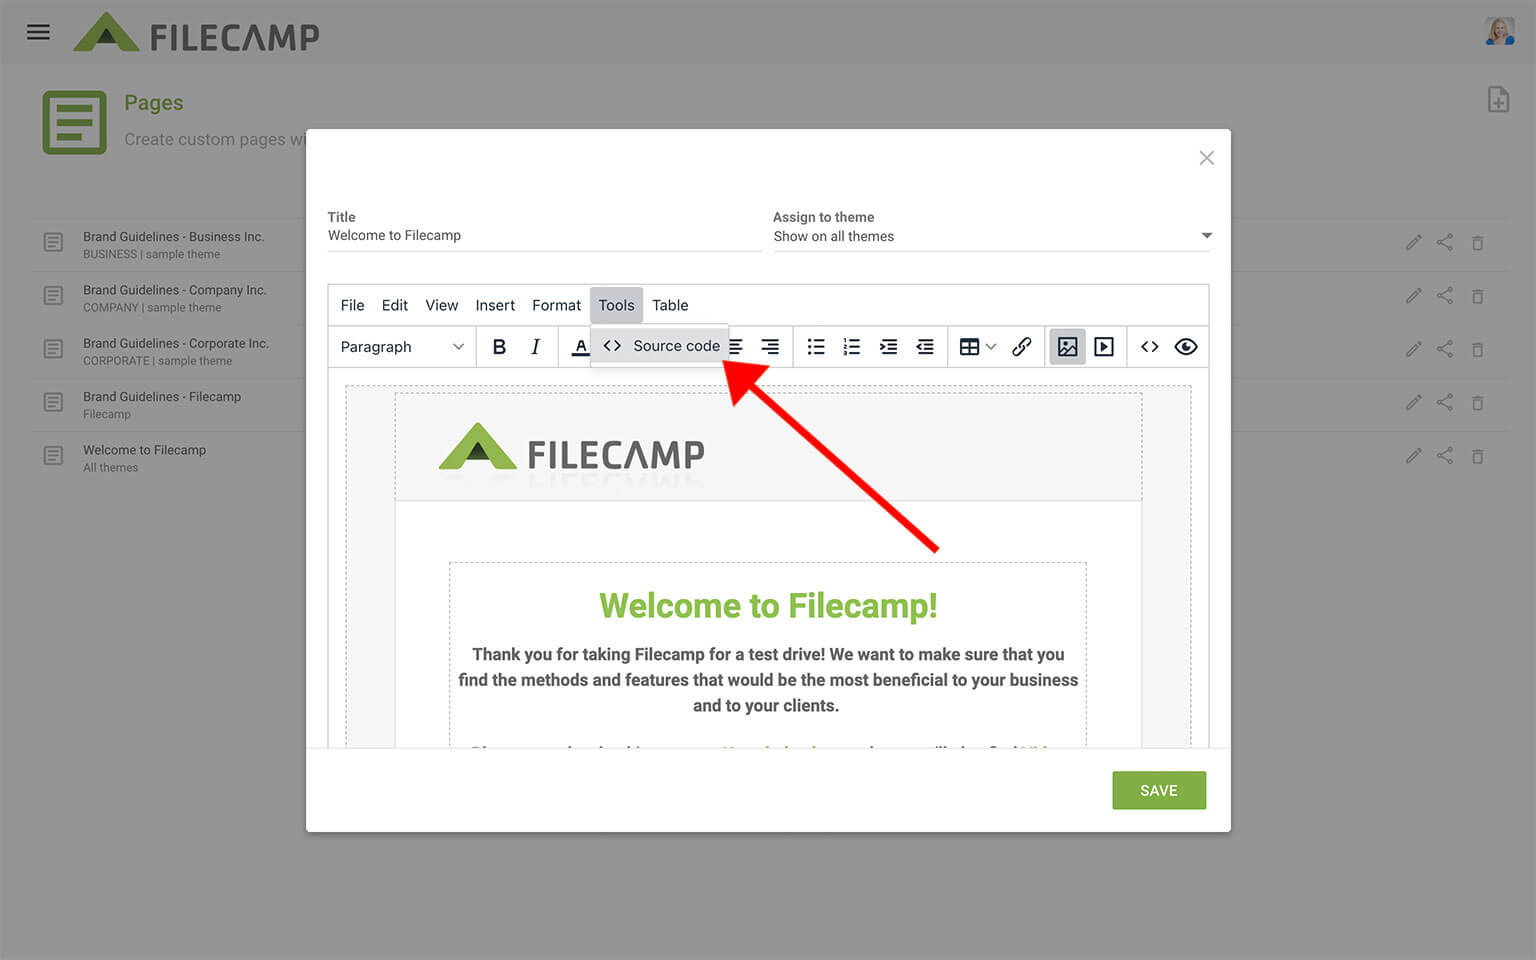
Filecamp’s Pages feature has an easy-to-use WYSIWYG (What You See Is What You Get) editor built-in, so you don’t need to learn HTML to create a simple page. But if you do know HTML or have an existing HTML layout you’d like to use, feel free to utilize your design skills.
To edit directly in HTML rather than using the editing tools, click on Tools > Source Code and add your code.
Adding images to a Page
Click the Insert/edit image button to insert an image/illustration to your page.
In the Insert/edit image window you can enter an external link to the image or Choose an image file from your Filecamp:
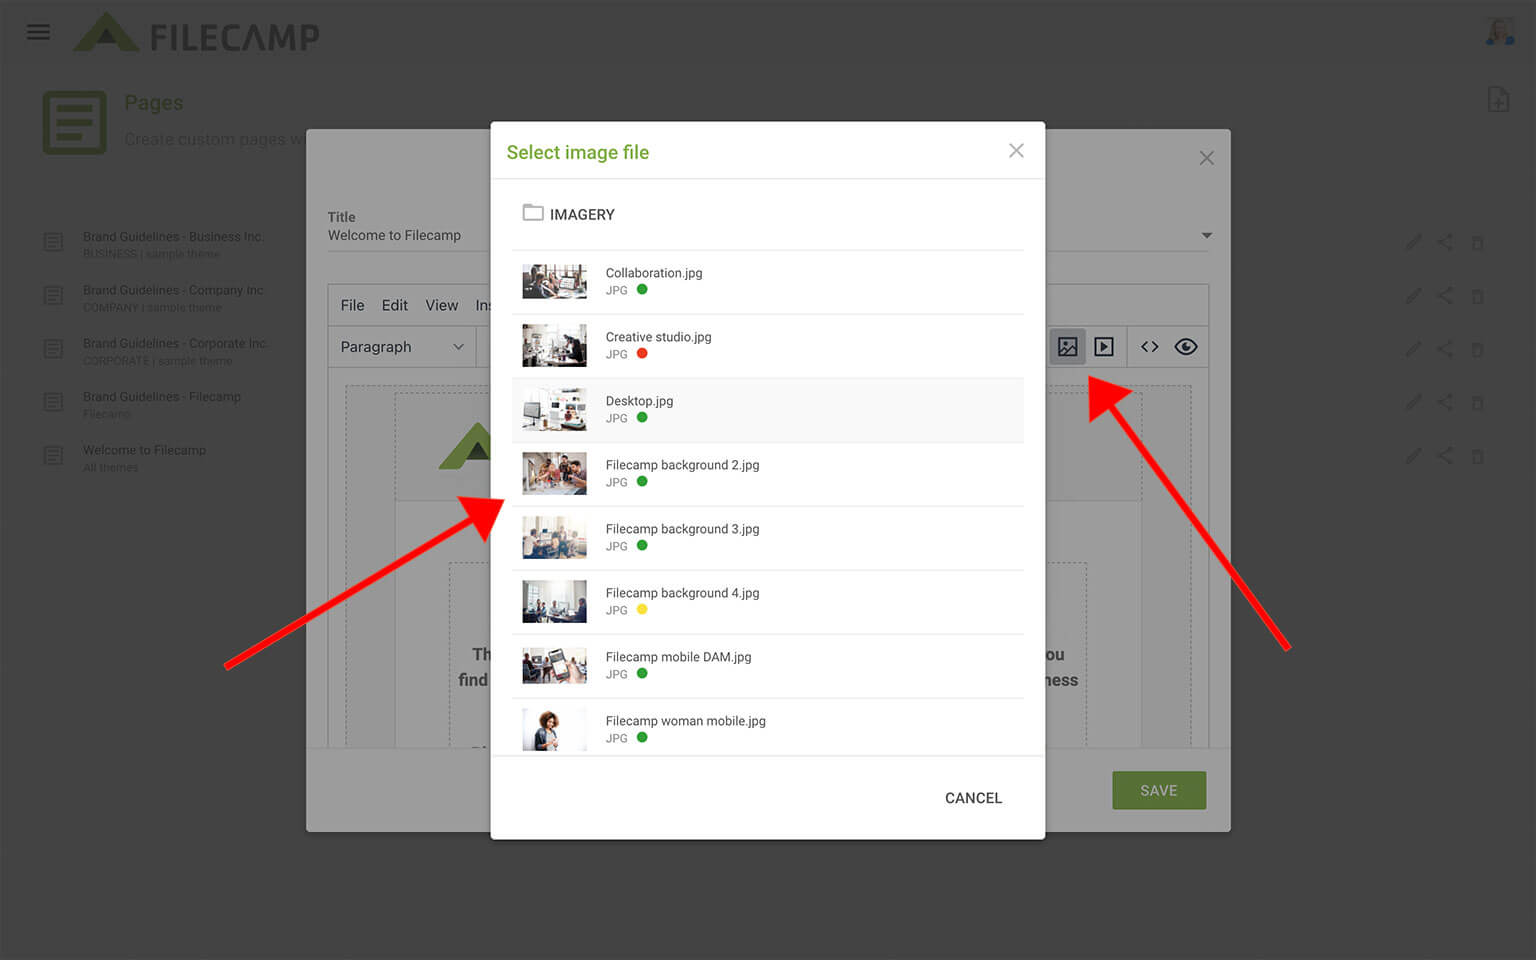
Tip: When inserting an image from your Filecamp a max 800x800px version of the image will be used. If you need to insert the original image you can find the direct links to the original in the Edit file window.
Share Page
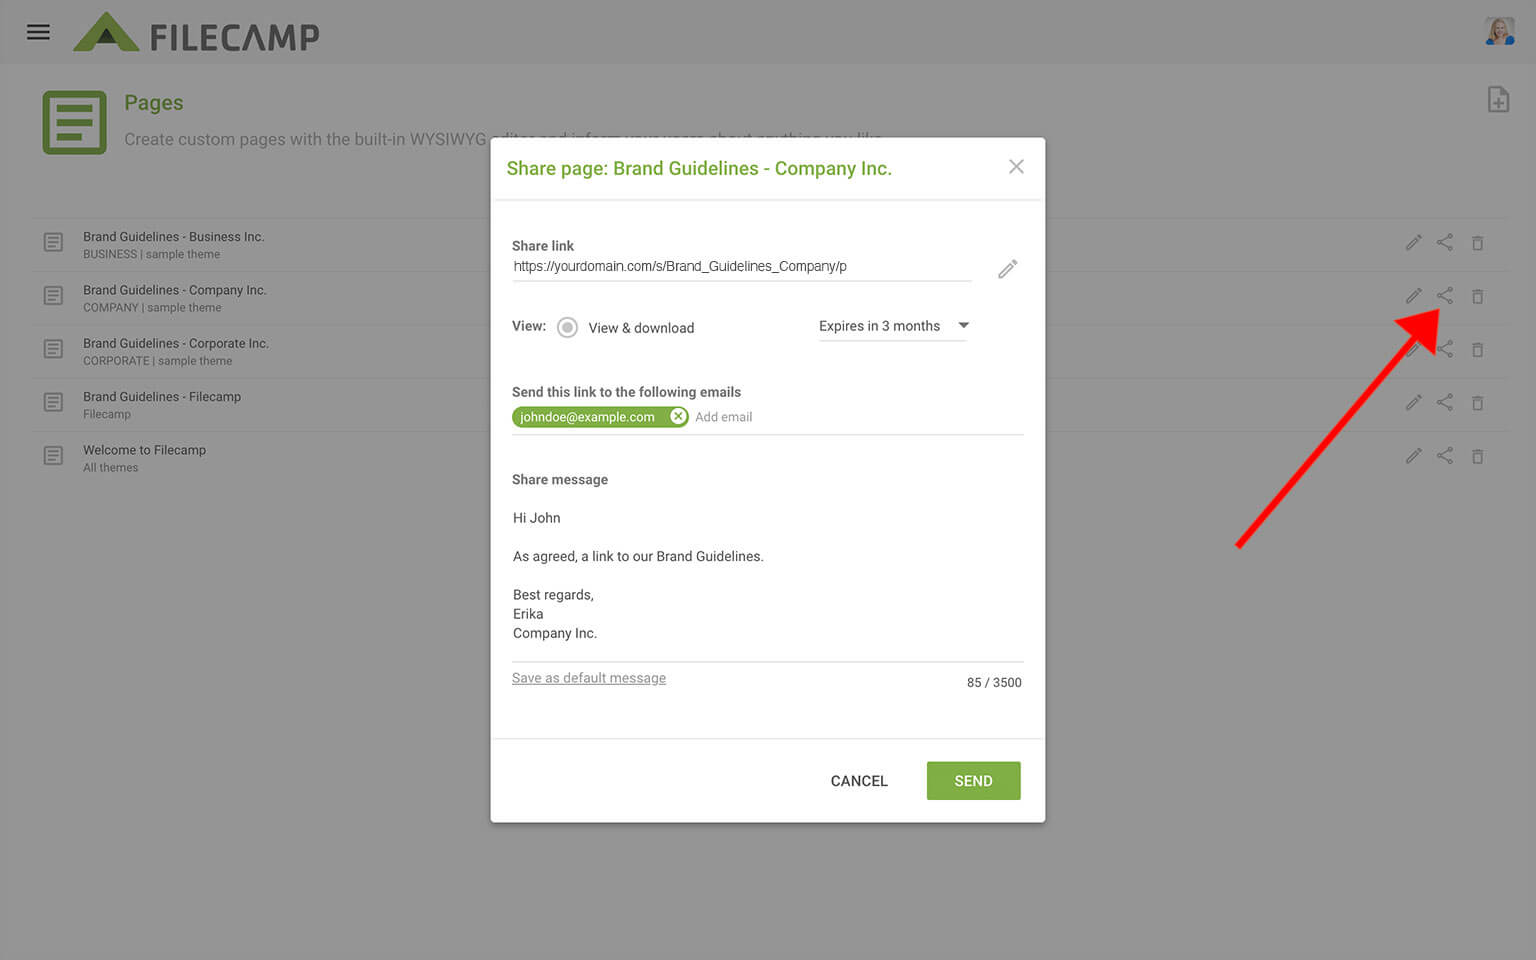
Besides adding your Pages to your users' Main Menu when they are logged in to your Filecamp, you can also share them with the general public via a simple link. Go to Admin > Pages. Then click on the Share ![]() icon.
icon.
You have now two options for dispatching the link: you can email the link directly from this window and specify specific link recipients in the “to:” field, or you can copy and paste the link into another place (your email application, social media, your company’s website, etc.)
If you only need to specify a handful of link recipients, go with the first option. Enter the email addresses of the recipients, enter a personal message, and click Send.
Remember also to set an expiration date for the link. If you want a permanent link you should choose Link never expires.
All recipients of the link will be directed to the Page, that could look like this:
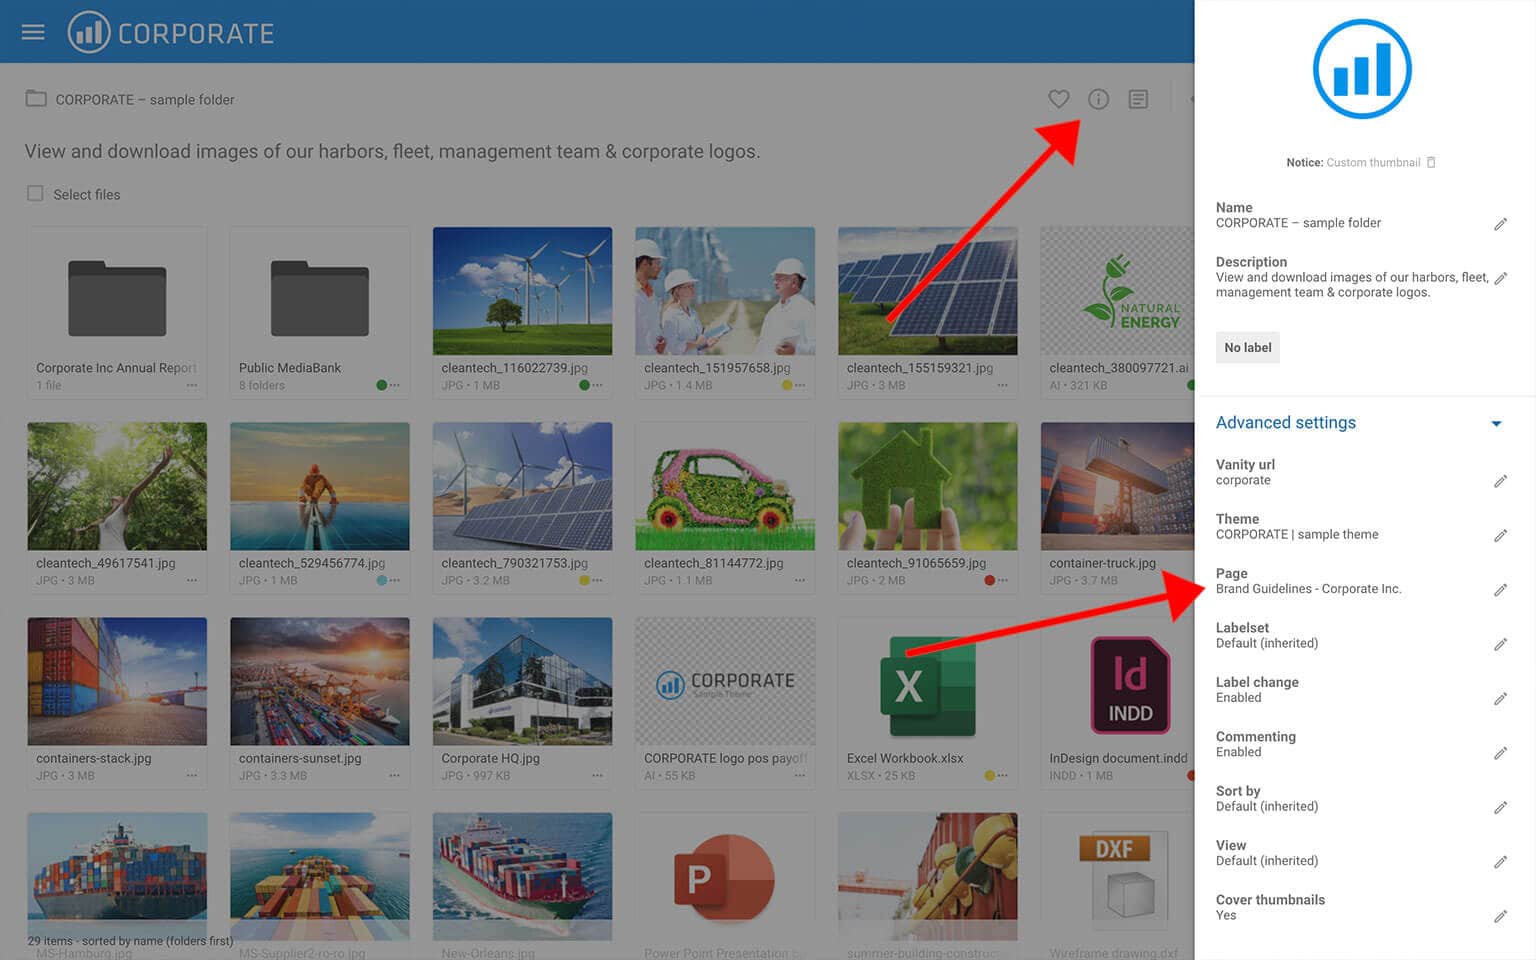
Assign a Page to a folder
Assign a Page to a folder and have the Page pops up whenever someone enters the folder.
Navigate to the folder you want to assign a specific Page to then click the Info ![]() icon. Select a Page in the Page dropdown menu.
icon. Select a Page in the Page dropdown menu.
The Page will now pop up whenever a user enters the folder. The Page can always be opened again by clicking on the Page ![]() icon in the Toolbar.
icon in the Toolbar.
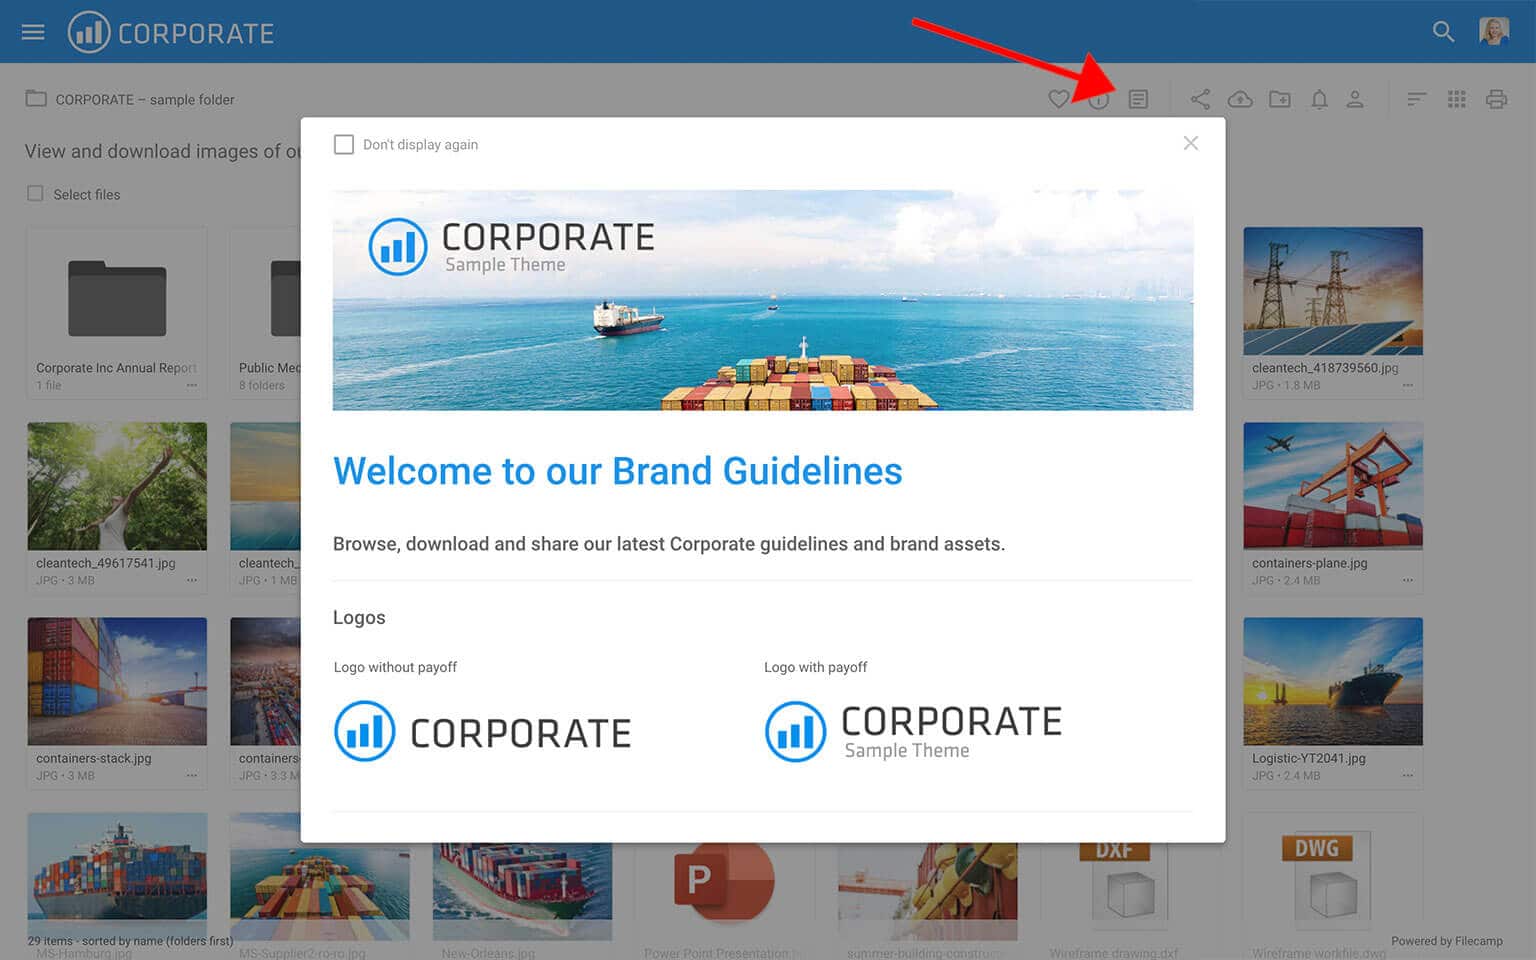
If you click the Don't display again checkbox, this page will not pop up again for you.
Notice: Pages is designed to be a super simple tool where Non-tech-savvy people quickly can design a page with text and images. If you can create a page in Microsoft Word or PowerPoint you can also create a page in Filecamp.
Pages can be modified via HTML but if you don't know anything about coding you should stick with the WYSIWYG editor, or ask a web designer for help.
This article reviews the following topics:
Custom pages are flexible and easy to use! Use them to communicate all types of information that will help your users such as:
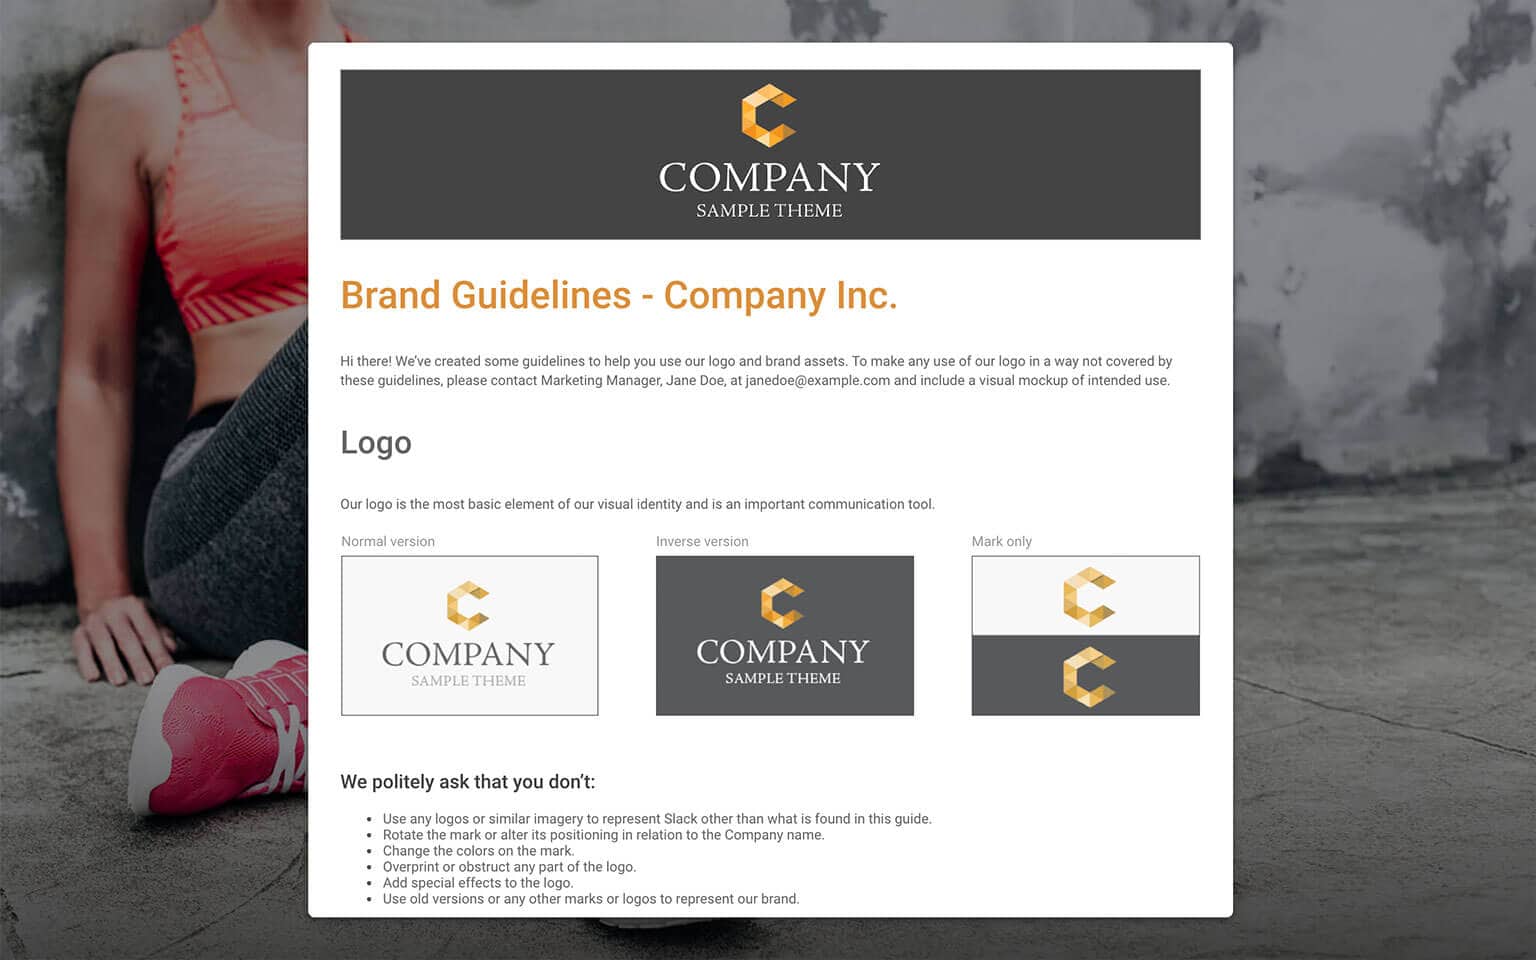
- Brand Guidelines [?]
- Getting started tips
- Best practice guides
- Usage terms
- Welcome message
- Contact us page
- Or?