Quick Start Guide for New Admins
Let's walk through a few easy steps for deploying Filecamp within your organization.
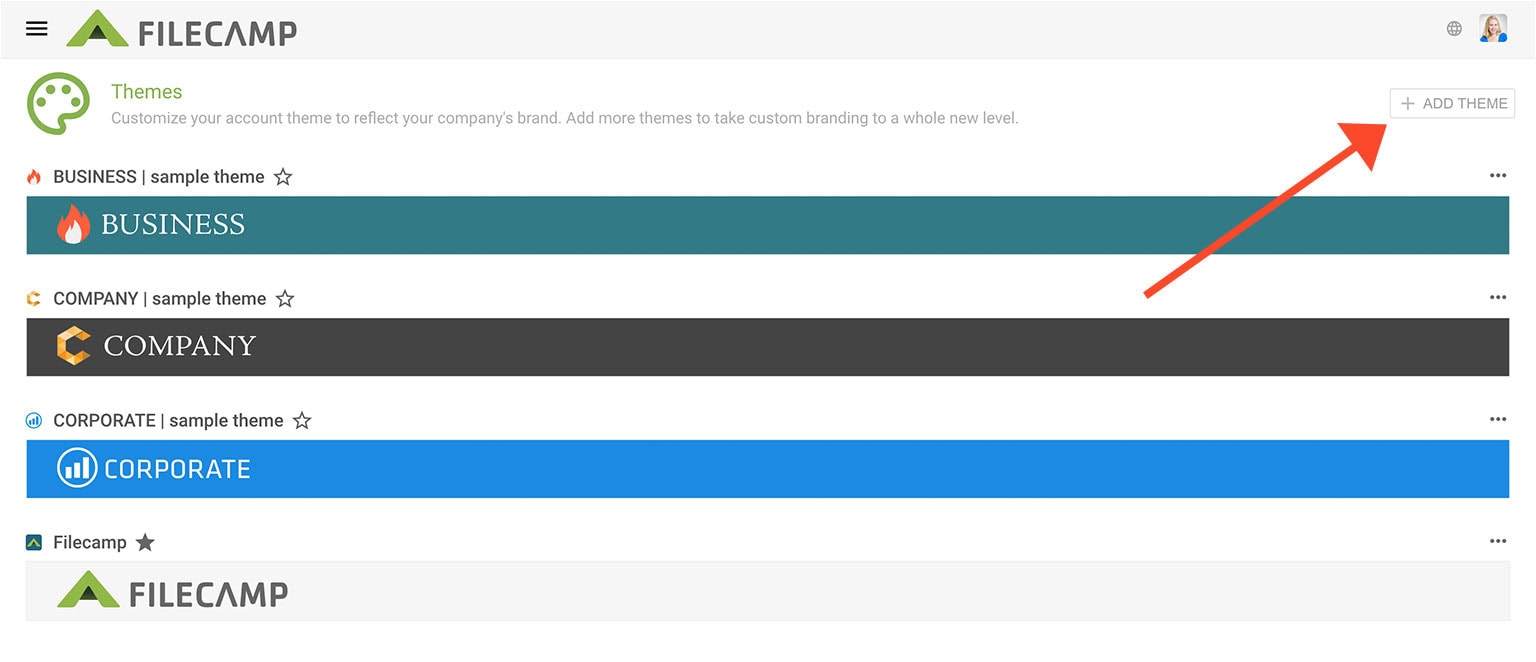
STEP 1 – Customize your account's branding
Navigate to Admin >Themes and you will see a few predefined sample Themes we provide. The default Theme is marked with a star ![]() . Click on one of the sample Themes to edit or click the
. Click on one of the sample Themes to edit or click the ![]() ADD THEME button to create a new Theme.
ADD THEME button to create a new Theme.
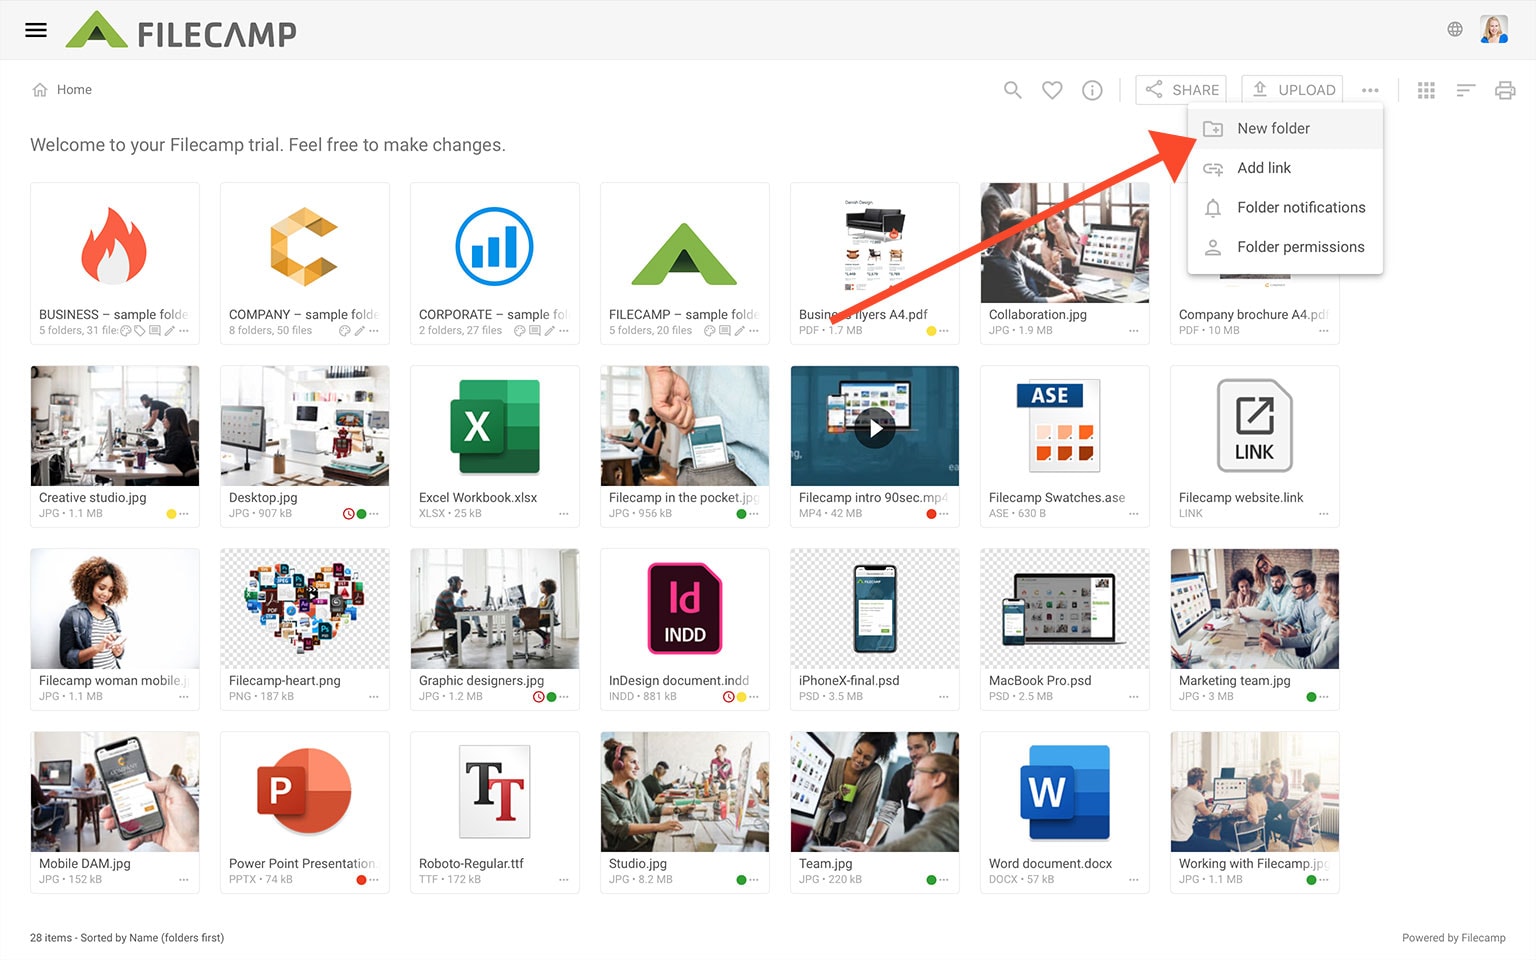
STEP 2 – Add some folders
You may want to transfer your current, internal folder structure or clean it up by planning a new folder structure. To create a new folder just click Add Folder ![]() icon in the toolbar.
icon in the toolbar.
STEP 3 - Upload files (or folders)
Navigate to the folder you want to upload files to, next click the Upload ![]() icon and then click Choose Files or Choose Folder.
icon and then click Choose Files or Choose Folder.
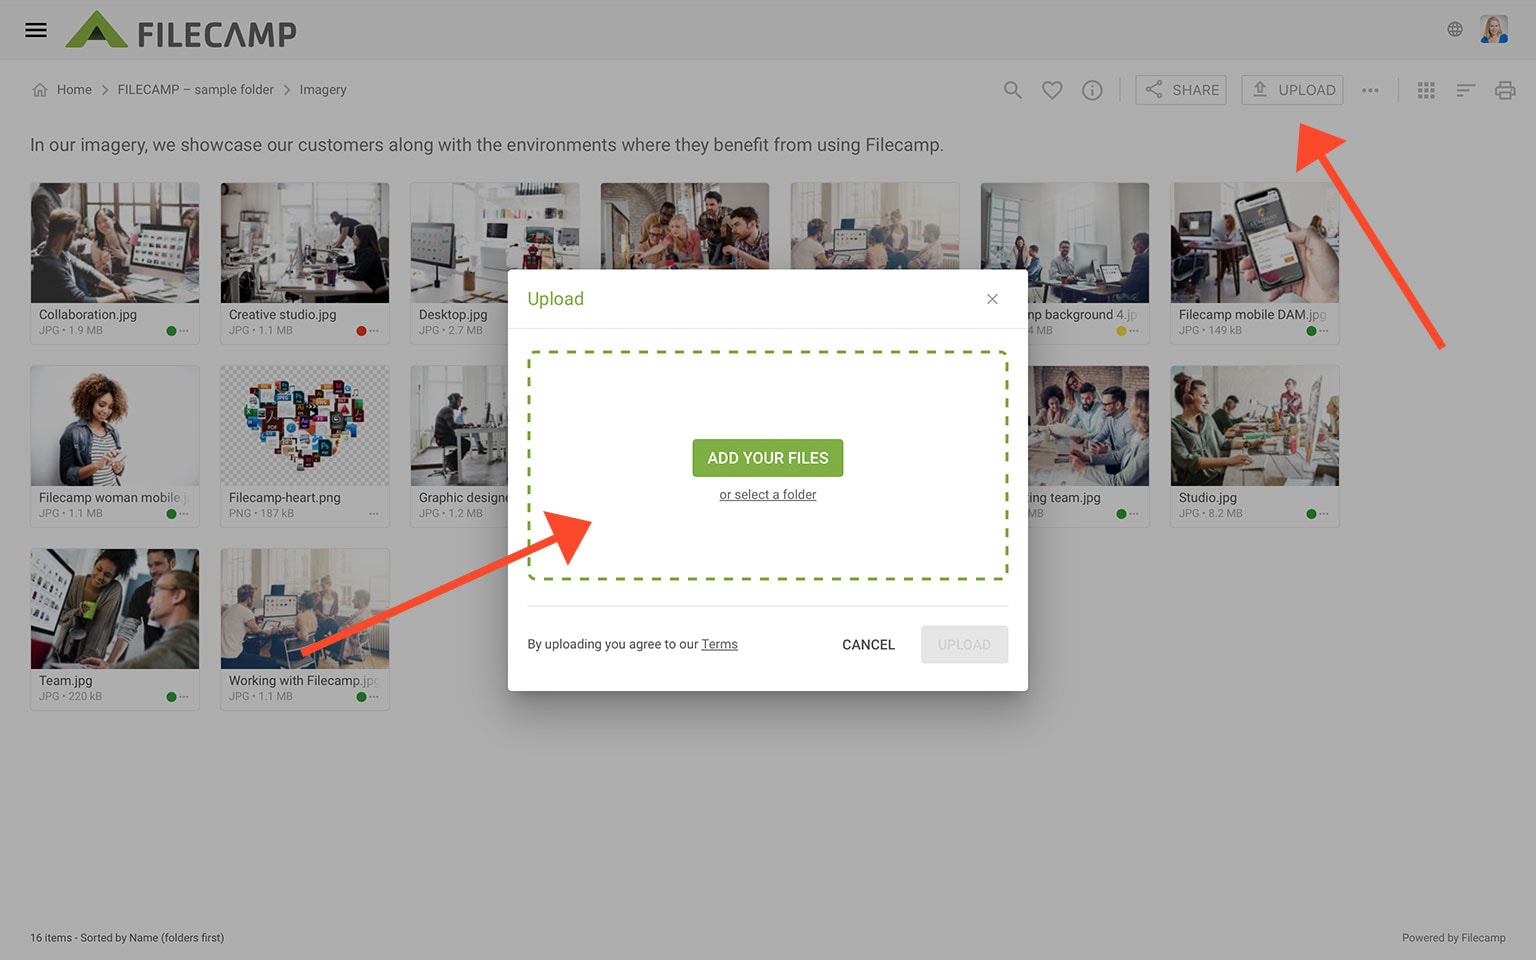
Select the specific files and folder from your local Mac/PC and click the Open button and click the Start Upload button.
When the upload process in finished click Done. You will be directed to the folder where you can see the files you have uploaded.
STEP 4 - Add tags to an image
To add tags or keywords to an image, click on the image and click the Info ![]() icon. You can also click the Three Dots Menu
icon. You can also click the Three Dots Menu ![]() below the image thumbnail. Choose Info
below the image thumbnail. Choose Info ![]() .
.
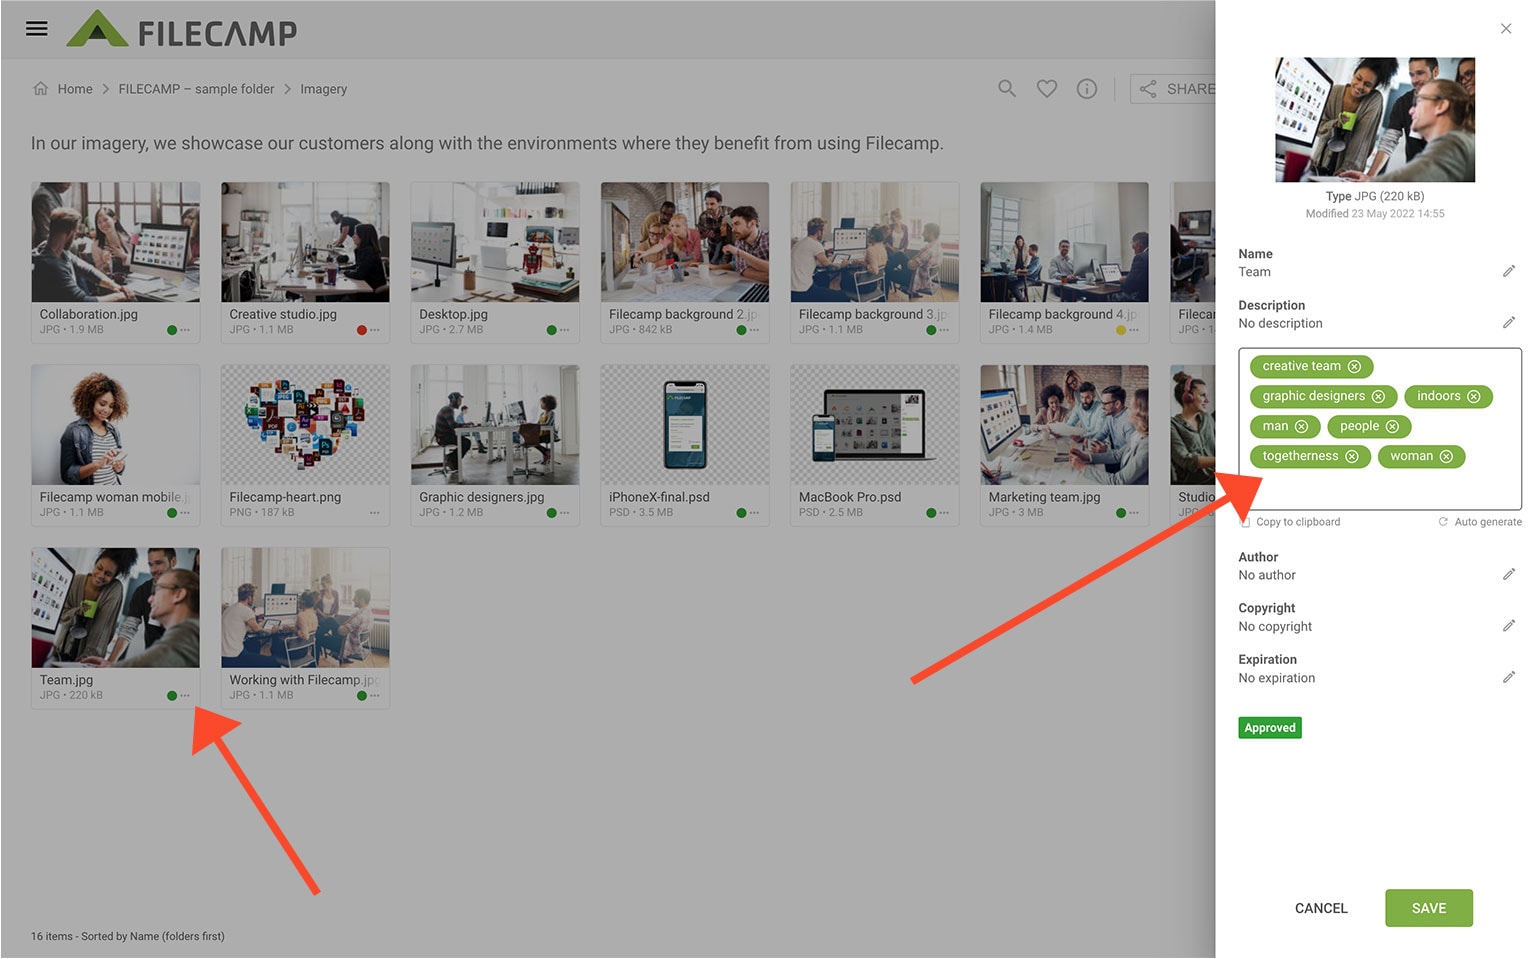
You can now enter some tags that describe the image. Remember that all tags are searchable, so they can really help you converting your files to real digital assets. For example, tags may make it easier to find assets later on.
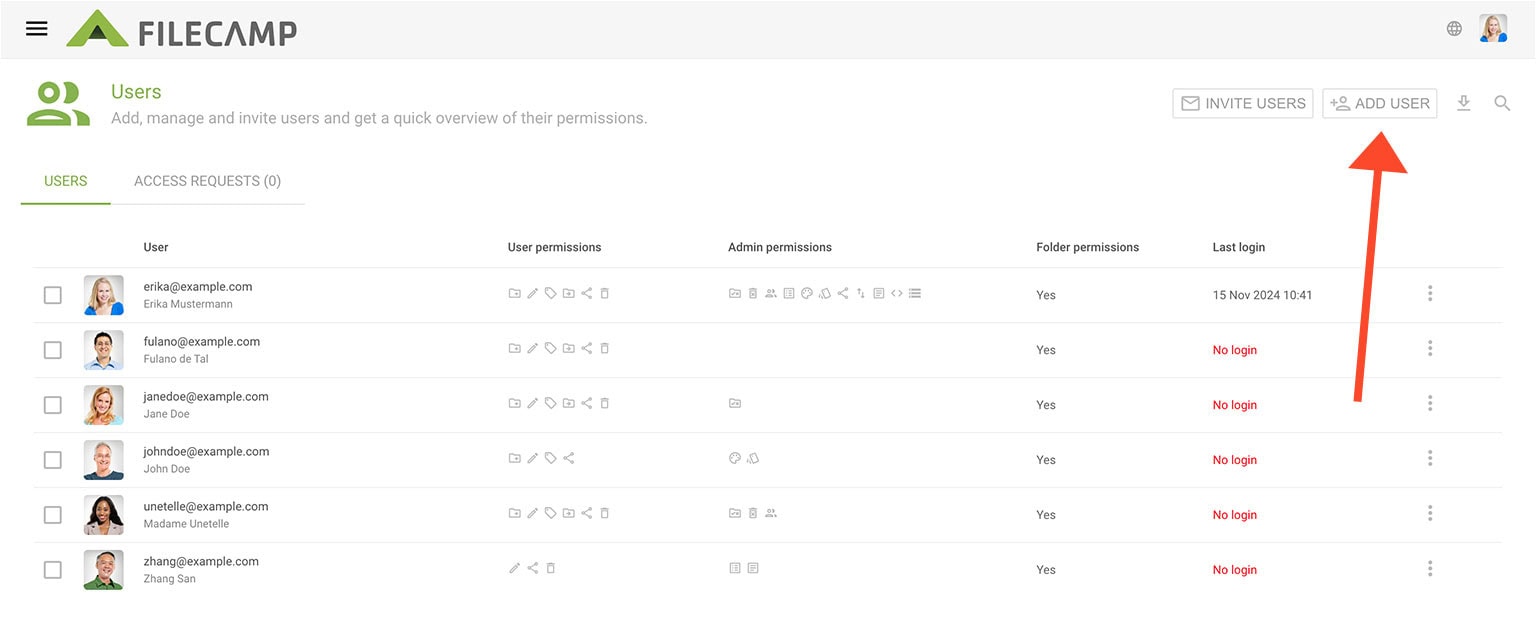
STEP 5 – Add Users
Filecamp comes with unlimited users in all plans and you can easily create new users and give them permission to the folders you want them to access. Go to Admin > Users and click the Add User ![]() icon in the Toolbar to add a user.
icon in the Toolbar to add a user.
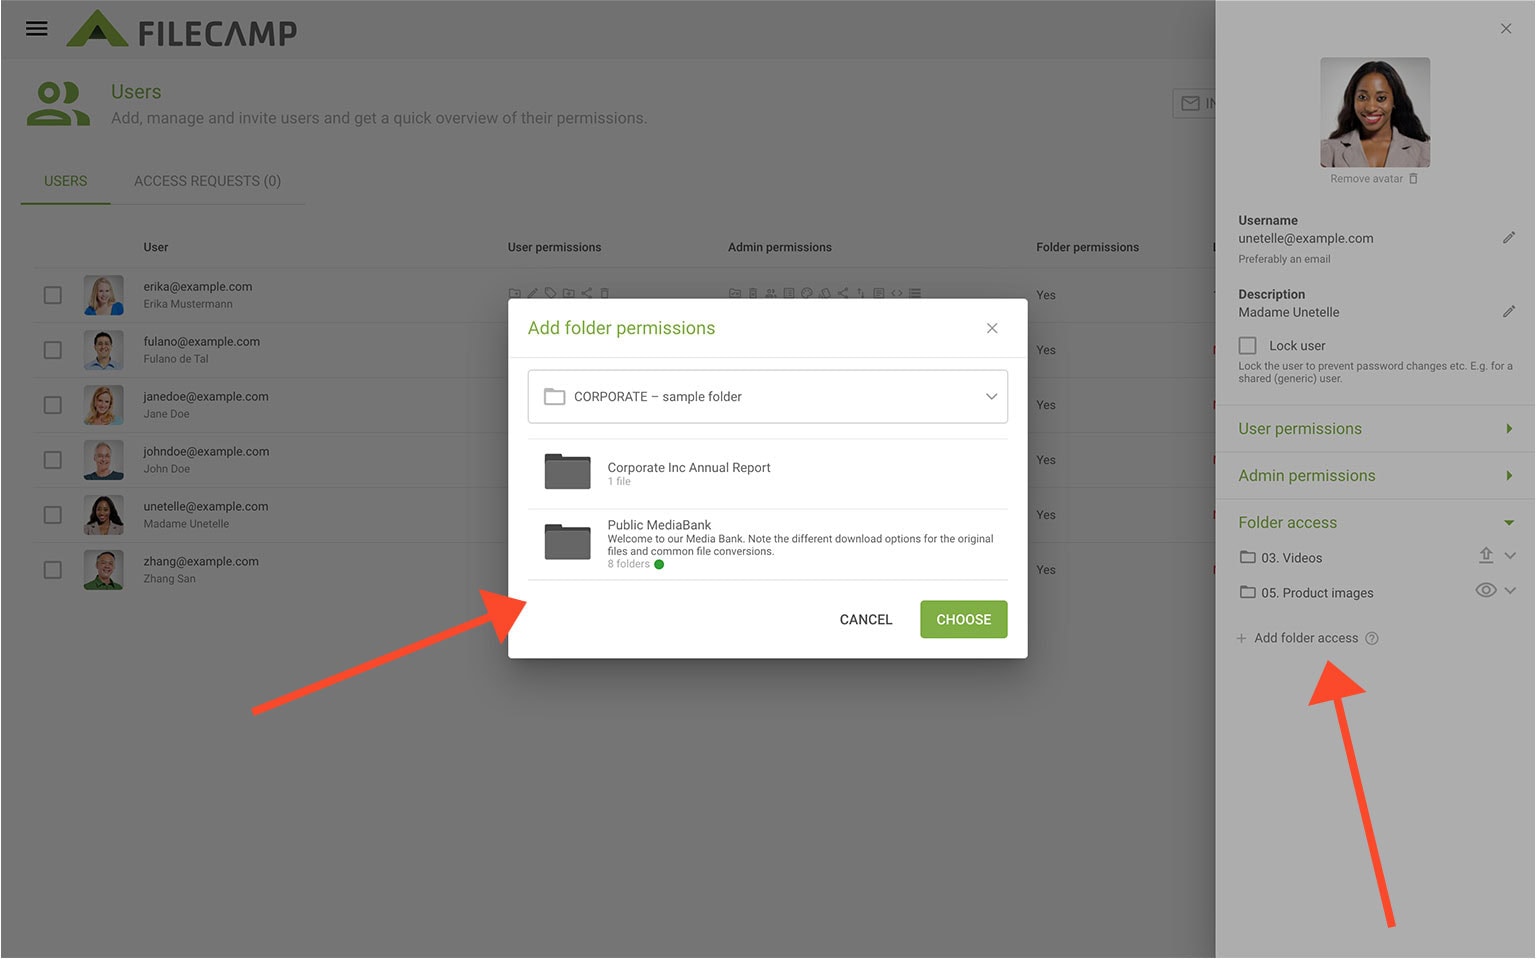
STEP 6 – Folder access
With folder access you can give users access to only the folders you want them to access.
STEP 7 – Invite Users
To invite a previously added user (see step 5) go to Admin > Users and find the user on the user list. Then click the Three Vertical Dots ![]() icon and select Invite
icon and select Invite ![]() . This will send an email to the user with the user's login credentials.
. This will send an email to the user with the user's login credentials.
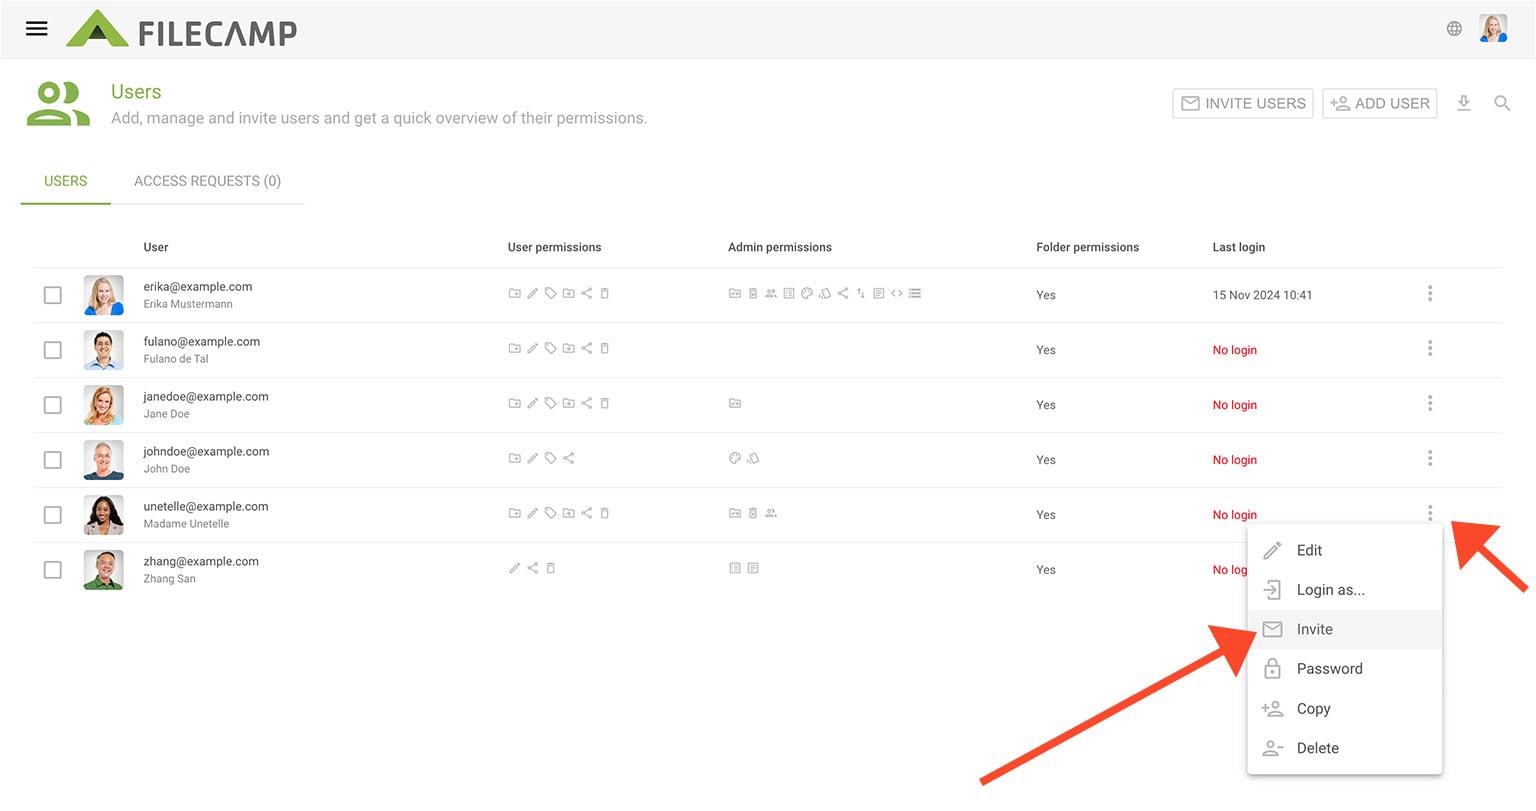
To quickly bulk add and invite multiple users to your account you can click the Invite users ![]() icon in the Toolbar, and just paste in the email addresses of the users you would like to add.
icon in the Toolbar, and just paste in the email addresses of the users you would like to add.
STEP 8 – Share files with links
Play around with Filecamp´s cool features for sharing files or folders with anyone without requiring them to login.
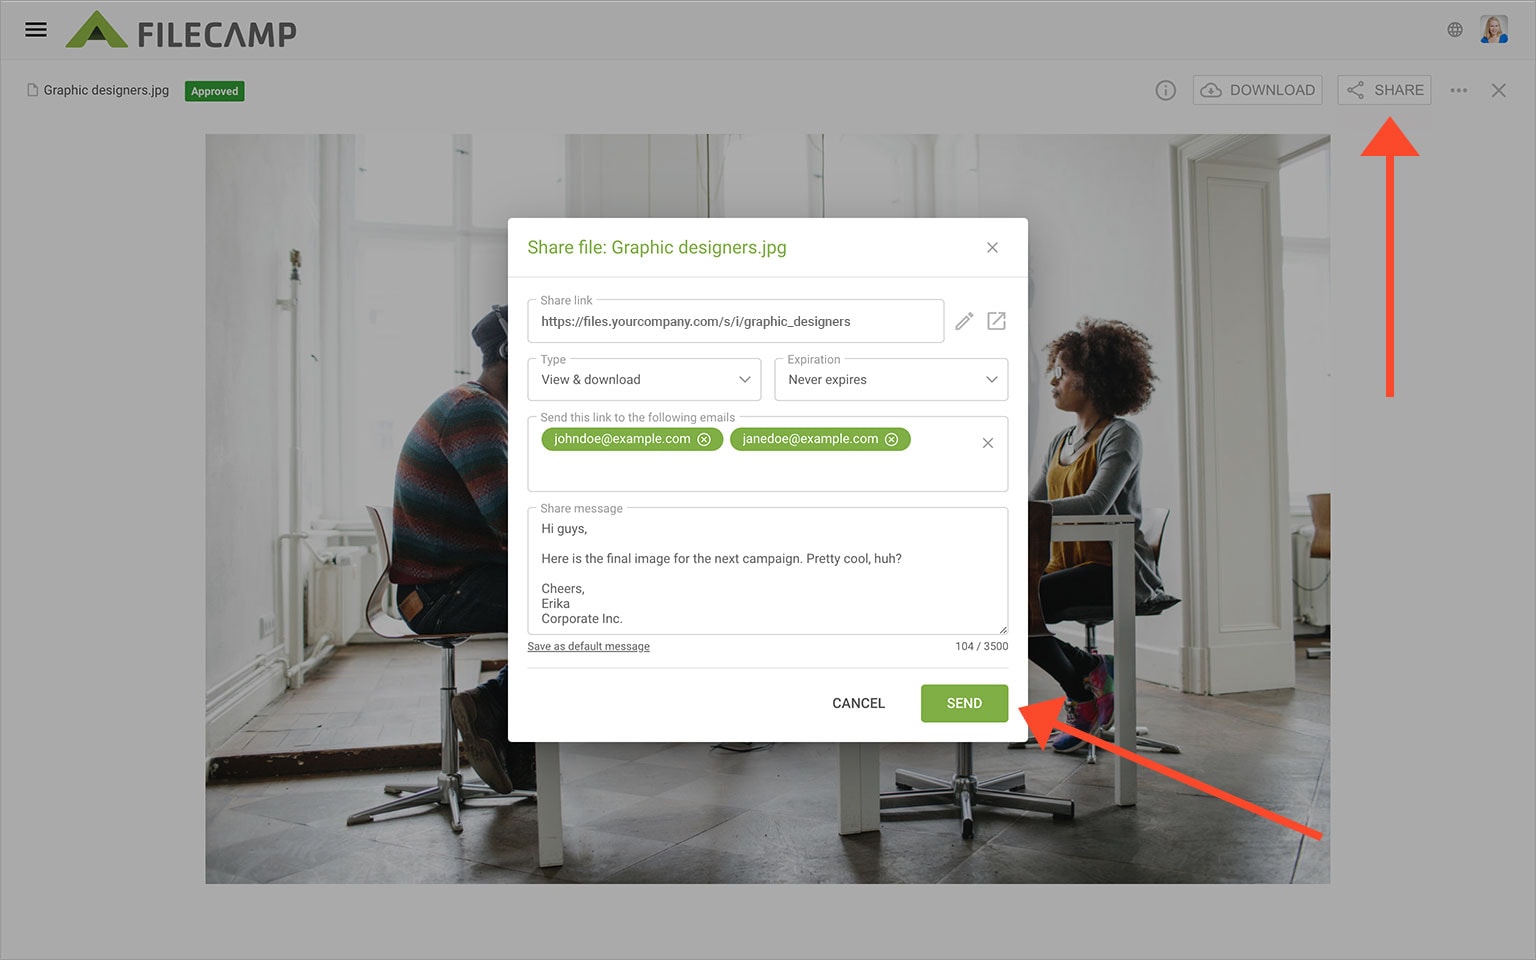
Read more about Share File Links, Share Folder Links, and Request files links.
STEP 9 – Email Notifications
To keep you on top of new events in your account, we’ve built a notification system that lets you know when new files or comments are added in your Filecamp. It’s up to you what actions you’ll be notified about, so here’s how to make your choices:
- Click the Notifications
 icon in the Toolbar.
 - Select which action you want to be alerted about. You can choose to be notified of new uploads, new comments, and label changes.
- You can also choose to be notified via an in-app message and/or email.

STEP 10 – How to get help
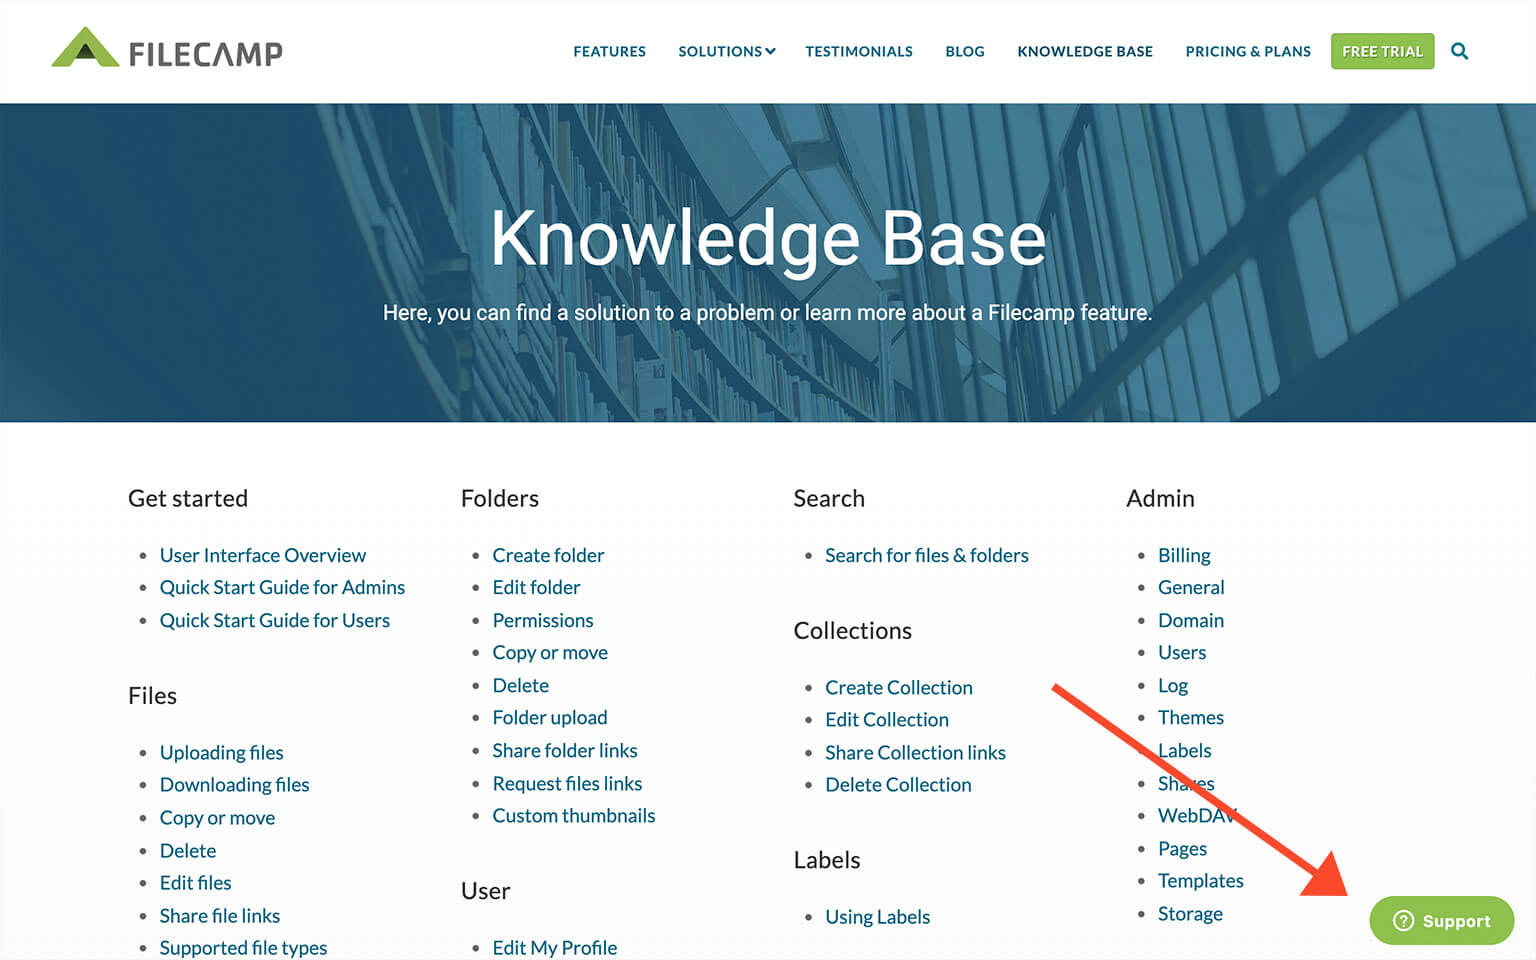
If you need any more help getting started, you can visit the Knowledge Base where you can contact the Filecamp support team as well.
Related articles
Files
Look and feel
Folders
- Create folder
- Edit folder
- Copy or move
- Delete
- Folder upload
- Share folder links
- Request files links
- Custom thumbnails
Users
Favorites
Search
Collections
- Create Collection
- Add files to Collection
- Remove files from Collection
- Share Collection links
- Delete Collection
Labels
Commenting
Trash
Admin
Tech stuff
Subscription

VIDEO
... or simply watch this!
View a 4 minutes video that will take you through some of the basic tasks in Filecamp.